Whilst writing the last article, I spotted a feature that I’d remember seeing an announcement about but hadn’t actually looked at yet. With my family away this week, what better time to spend a few minutes after work having a quick look and hopefully remind someone else as well 🙂!
Context
When creating PaaS resource in Azure, such as Storage Accounts, Key Vaults and SQL Databases, you have generally have three or four options for networking:
- Leave it Open to the World - This is the default option and allows the resource to be accessed over the Internet from any address. Obviously not great for security.
- Restrict Access with IP Rules - If you wanted to keep public access over the Internet, but want a level of control, you can restrict access to specific IP addresses.
- Restrict Access with Service Endpoints - This option allows you to restrict access to the resource from specific subnets within your environment. It is not available for all resources and can only be accessed from workloads within Azure (without some funky NAT/routing setup anyway).
- Restrict Access with Private Endpoints - This option again allows you to restrict access to the resource from specific subnets within your environment but can also be accessed from on-premises networks. It is generally available for most PaaS resources, and utilises a NIC placed in one of your networks to facilitate the private connectivity.
As part of a defence in depth approach, it is good practice to try and utilise private networking where you can. However, this is not always possible, and as such you may need to restrict solely based on public IP addresses at times.
Historically, you’d have had to manage this manually on a per-resource basis, by adding and removing IP rules as needed. This is not ideal, particularly if you have a large environment and a number of resources that need updating. Tools such as Infrastructure as Code (IaC) can help here, but there is still an additional overhead and likely multiple places to udpate.
There is now a better way! Introducing Azure Network Security Perimeters. It’s been in preview for a while, but as of August 2025 (I think?) it is now generally available.
Not all PaaS resources are yet perimeter aware, but this will change over time - https://learn.microsoft.com/en-us/azure/private-link/network-security-perimeter-concepts#onboarded-private-link-resources.
Overview
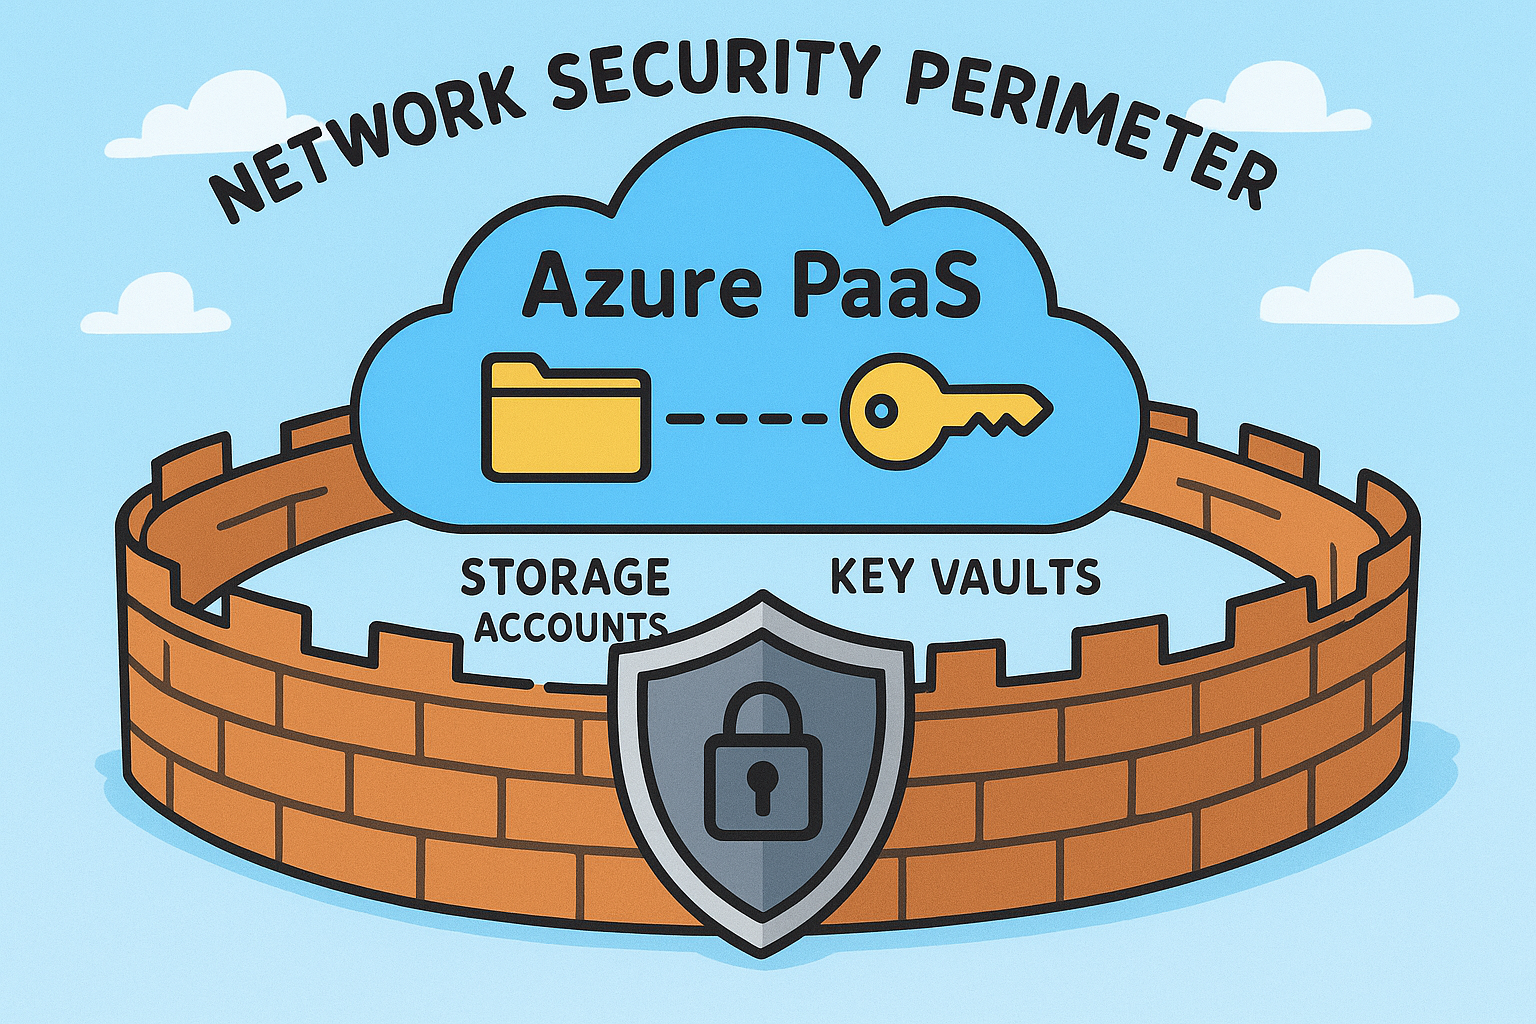
An Azure Network Security Perimeter (which I’m just going to call NSP from now on!) is a new feature that allows you to centrally manage network access to a group of PaaS resources in one place. Think of them as “Network Security Groups for PaaS resources”.
These are not a replacement for private endpoints - they are still used to provide private connectivity to your resources. But NSP helps make management of any public access across these resources easier. It can also restrict outbound access to help prevent data exfiltration.
By default (kind of 😉), NSP blocks access to PaaS resources, but you can grant exceptions through inbound/outbound rules as necessary.
Components of an NSP
The key components of NSP are:
- Network Security Perimeter - An Azure resource that contains one or more of the following:
- Profiles - Profiles are used to associate resources to rules for public access. Each profile consists of:
- Name - A name for the profile.
- Associated Resources - One or more PaaS services that are bound to a profile within your NSP profile. There are two access modes resources can be bound to an NSP using - we will cover this in a bit.
- Inbound Access Rules - A list of rules that allow inbound access to the associated resources. These can be based on public IP addressing, or a specific subscription.
- Outbound Access Rules - A list of rules that allow outbound access from the associated resources. The only destination currently supported is FQDNs.
- Diagnostic Logging - Consistent diagnostic logging can be enabled for all resources within the NSP to ensure visibility of all network traffic.
- Profiles - Profiles are used to associate resources to rules for public access. Each profile consists of:
Resource that are associated with the same NSP do not require inbound/outbound rules to be defined and will be able to communicate.
An Example
Let’s work through an example.
Create a PaaS Service
I’ll stick with storage accounts as they are nice and straight forward. Let’s create a simple storage account that is open to the world and upload a file into a public container.


If I try and access the URL directly, I can access the file without issue…
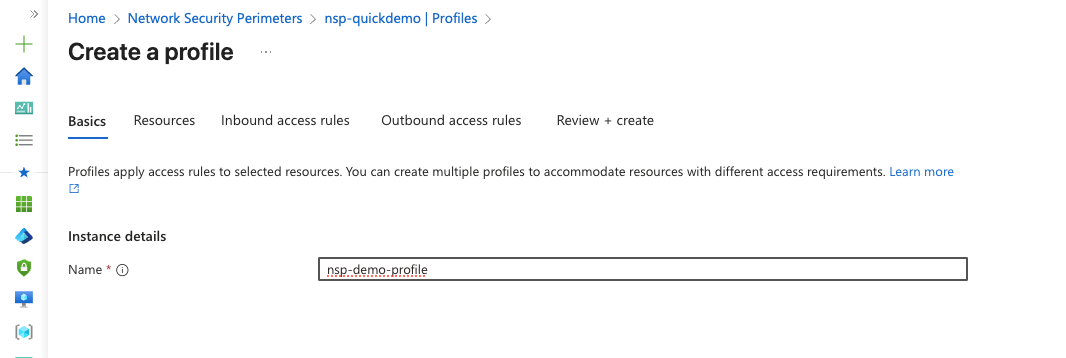
Create NSP and Associate the Resource
Next, I’m going to create a new NSP and associate the storage account with it. As mentioned before, a NSP consists of one or more profiles which define the rules, so we will need to create one of these too.
If you create the NSP through the portal, you’ll have a “defaultprofile” out of the box (unless you renamed it). I’ve removed this and will create a new one.
Let’s associate our test storage account with it…
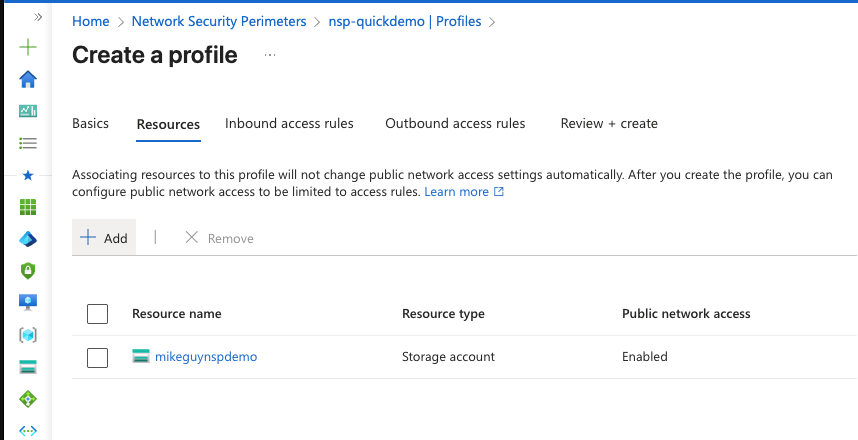
For now, I’m going to leave the inbound and outbound access rules blank. This should block access to the storage account over the Internet. Right?
Testing Access
Now we have our NSP created, and associated it with our storage account, what happens if we try and access our blob again?
Hmmm… we can still access the blob! Why’s this then? Earlier on I mentioned that there were two access modes:
- Transition Mode - This is the default and operates in an advisory mode. Access is not actually blocked by associating the resource to the NSP at this point. In transition mode, any resource rules that you have in place on the resource directly will still be evaluated (for example, “public access” or a set of restricted IPs).
- Enforced Mode - Once enabled by the administrator, it will deny all traffic that does not have an explicit permit rule in the NSP (except for any intra-perimeter traffic). Rules directly on the resource are no longer evaluated.
The table shown in the Microsoft Documentation explains the different enforcement behaviour based on the configuration. The final rule behaviour is a combination of the “public network access” setting on the PaaS resource, and the enforcement mode of the NSP association.
| Public Network Access Setting | NSP Association Status | Inbound Access | Outbound Access |
|---|---|---|---|
| Enabled | Not associated | Resource rules are evaluated | Access is allowed |
| Enabled | Associated in transition mode | Resource rules and NSP rules are evaluated | NSP rules are evaluated, but access allowed regardless |
| Enabled | Associated in enforced mode | Only NSP rules are evaluated | Only NSP rules are evaluated |
| Disabled | Not associated | Access is denied | Access is allowed |
| Disabled | Associated in transition mode | NSP rules are evaluated | NSP rules are evaluated, but access allowed regardless |
| Disabled | Associated in enforced mode | Only NSP rules are evaluated | Only NSP rules are evaluated |
| SecuredByPerimeter | Not associated | Access is denied | Access is denied |
| SecuredByPerimeter | Associated in transition mode | Only NSP rules are evaluated | Only NSP rules are evaluated |
| SecuredByPerimeter | Associated in enforced mode | Only NSP rules are evaluated | Only NSP rules are evaluated |
To change the access mode of a resource in the portal, navigate to your NSP, select “Associated resources” and then in the ellipsis menu on the right, select the “Change access mode” option.
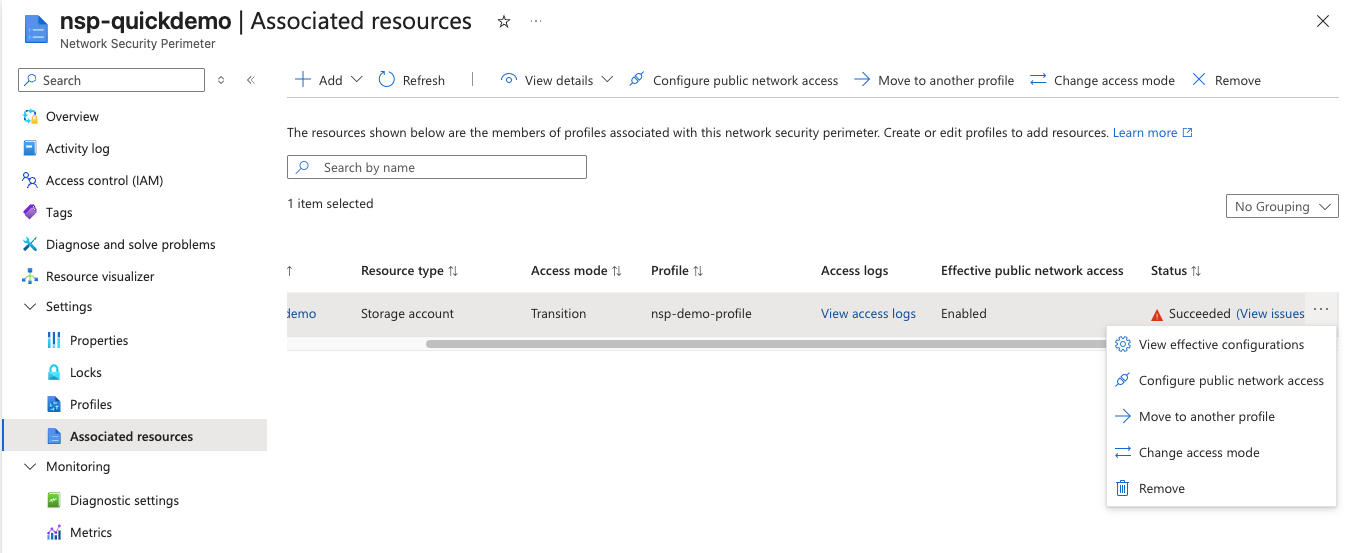
The eager eyed reader will notice a little warning icon in my status column - we will come back to this in a bit.
Let’s change to enforced mode and try again…

Now when we try to access the file, we receive an error — the network security perimeter has blocked access as expected! If we want to allow access, we just need to add an inbound rule to our profile (obviously I used my real IP not a bunch of x’s!)

A few seconds later, and access is restored.
Multiple Profiles
My curious mind immediately then wondered “can you associate a single resource to multiple profiles”. It would seem logical that you can, and when I began to configure it, it looked like it was going to work! But on saving the configuration, I got the following error…
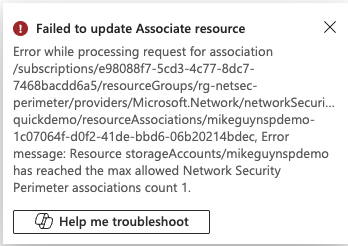
Looks like that is a no then. Keep that in mind when designing your configuration.
Outbound Rules
I mentioned earlier that I had a warning in the status column of my association. Let’s have a bit of a closer look at that…
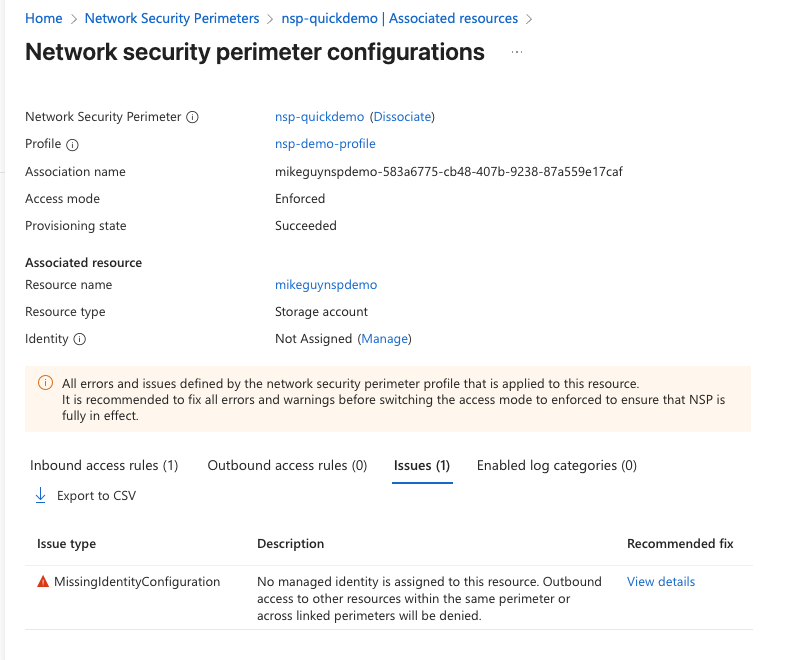
The description of the flagged issue is…
“No managed identity is assigned to this resource. Outbound access to other resources within the same perimeter or across linked perimeters will be denied.”
We said earlier that by default, resources in the same perimeter can communicate with each other by default. And whilst true, they require a managed identity in order to be able to do this. This will also apply if you have utilised a “subscription” type inbound rule - without the managed identity on the calling resource, Azure will not be able to understand and enforce this, and access will be denied.
With an inbound rule based on subscription and the use of a managed identity, you can allow communication between services within Azure, without private networking but still have public network access disabled! There is a great example of this in Stephane Eyskens medium post late last year.
Summary
That’s one more thing ticked off my “must play with” list! Just ♾️ left to go.
Hopefully this will have made a few people aware of a feature that they may not have yet spotted. Go give it a try and let me know what you think!