
HashiCorp recently announced that the Terraform Stacks functionality in HCP Terraform had now moved into public preview! I’d actually enrolled onto the private beta earlier in the year, but unfortunately never got around to testing the functionality.
With it now in public preview, I figured it would make a good article and would force me to spend some time playing with it.
As usual, I like learning the hard way - giving it a go, then hitting the docs when I get stuck or when I need to validate I’ve done things correctly. This was no exception and it took a little trial and error to get it going, which I’ve kept in the later sections.
I’m going to stick to a relatively basic example in this article. I’ll explore some of the more complex use-cases such as deferred planning in a later article.
What Challenges do Stacks Address?
Based on the HashiCorp documentation, Terraform Stacks aims to address a few key challenges.
Managing Multiple Environments
Whether “environments” means multiple development lifecycle environments (e.g. dev, test, staging, prod) or different regions of a cloud provider, splitting up your Terraform workspaces and state for these purposes is common and a good practice.
The challenge has always been around orchestration of these. Usually, custom CI/CD pipelines had to be written in order to deploy across these different environments in turn, with different workspaces (and state) and different variable input files.
Managing Cross-Workspace Dependencies
Even if you aren’t using separate environments for some reason, trying to put all of your resources into a single workspace came with its own challenges. In larger environments, this resulted in slow plan/apply times and depending on how your organisation operates, may have made code ownership across differing teams more complex.
Again, as a result components were often split into different workspaces, with custom CI/CD pipelines doing the heavy lifting of dependencies and ordering.
Multi-Step Provisioning Use-Cases
Imagine you are building a Kubernetes cluster in one of the cloud providers, but you also wanted to manage your Kubernetes environment using Terraform within that same configuration. Your Kubernetes provider block needed details that aren’t available until the cloud provider had finished building resources.
These unknown provider attributes often meant that Kubernetes resources were moved into separate configuration/workspace, so that the order of execution can be controlled manually and/or by pipelines.
EDIT - I was talking out of my rear end here - please see part 2 for a more accurate explanation.
With all of these examples came a few key challenges:
- Dependency Management - CI/CD or manual logic had to be used to ensure that workspaces were being executed on in the correct order.
- Workspace Management - Terraform Cloud workspaces would have to be created and managed separately outside of the main configuration. If you wanted to add a new environment, you’d need to bootstrap the workspace, secrets etc. first. Again, automatable, but a bit of a pain.
In the rest of this article we are going to focus on the latter of these two. We will explore dependency management and features such as deferred planning at a later date.
Introducing Terraform Stacks
Terraform Stacks aim to address some of these challenges by introducing some new higher-level concepts and configuration items to replace the traditional “root module” that we all know and love.
HashiCorp’s documentation states…
“A Stack lets you manage several connected infrastructure modules and streamlines repeating that infrastructure several times all within a single Terraform configuration.
Stacks extend the IaC concept with a new configuration layer that replaces the root module and sits on top of your Terraform child/shared modules.”
There are a few main concepts we will see introduced with Stacks:
- Components - Defines the modules that will make up a given stack. For example, maybe we will reference a VNet module to build networking, and a VM module to deploy some compute workloads.
- Deployments - Defines each environment that we need. Again, an environment could be lifecycle-based (dev, test, staging, prod), region-based (AWS US East-1 and US West 1), or any number of different use-cases you may have. There are no hard and fast rules here.
- Orchestration Rules - Allow you to setup automated event handling rules. For example, auto-deploy to development if planning succeeds, but don’t apply against staging and production.
Let’s Get Building - Prerequisites
What better way to familiarise ourselves than by building an example and walking through it. First things first, we need to make sure we have a few prerequisites in place.
Enable Stacks
Ensure that the Stacks functionality has been enabled for your organisation, as it is not on by default. Head over to Settings > General and ensure Stacks is ticked. Don’t forget to click “Update Organization” once you’re done.

WARNING - Stacks is currently in public preview and is subject to change and stability issues. I’d not advise using it for production workloads at this time.
Version Control System
You’ll need a VCS to store your code in, and you’ll need to hook this up to Terraform Cloud. This is currently the only way of integrating with Stacks. Again, if you’ve not already done this, you can head over to Settings > Version Control > Providers and use “Add a VCS provider”.
You’ll need appropriate permissions in the target platform to be able to do this, including the ability to create webhooks which will be used by the Stacks functionality later to monitor for changes.
Terraform CLI
We will need an alpha version of Terraform in order to use Stacks. You’ll also want the new tfstacks tool.
For the alpha version of Terraform, I just downloaded it, unzipped it and added the local executable to my PATH temporarily…
curl -o terraform.zip https://releases.hashicorp.com/terraform/1.10.0-alpha20240926/terraform_1.10.0-alpha20240926_darwin_arm64.zip && unzip terraform.zip && export PATH=$PATH:$(pwd)
I tried a couple of different alpha versions to get around a later error I’ll talk about, but it didn’t make a difference, so probably just go for the latest.
To add tfstacks, I used the homebrew command brew install hashicorp/tap/tfstacks. If you’ve not previously added the HashiCorp tap, you’ll need to do so with the command brew tap hashicorp/tap.
Modules
Next up, we are going to want some modules we can use to provision some resources. I’ve got some very simple ones added to the Terraform registry - one that creates a VNet, one that creates a VM. Nothing exciting, and not what I’d necessarily recommend for the real-world, but they’ll do for the purposes of this example.

You could of course just use local modules within your stacks folder - they don’t have to be in a repo/registry (though I’d obviously recommend they as a matter of best practice). What you can’t do however, is define resources directly in the .tfstack.hcl file that we will come to soon.
Azure Credentials and Subscriptions
Finally, we need somewhere to place the resources we are going to build, and some credentials in order to deploy them. Terraform stacks relies on using federated workload credentials, which if you weren’t using anyway, you really want to be!
I’ve already got some subscriptions setup in my Azure tenant, so I just scripted the creation of the app registrations and setup the federated workload settings.
# create_app_registrations.sh
tenantId=$(az account show --query tenantId -o tsv)
declare -A subscriptionIds=( ["dev"]="ca8cc1e9-df12-4028-8697-50854c5a0923" ["stg"]="bc884483-24ef-40c5-b8d4-0c35a50ca8f8" ["prd"]="e98088f7-5cd3-4c77-8dc7-7468bacdd6a5" )
declare -A clientIds
for env in dev stg prd; do
appName="terraform-stacks-app-$env"
subscriptionId=${subscriptionIds[$env]}
echo "Creating app registration for $env..."
appId=$(az ad app create --display-name $appName --query appId -o tsv)
echo "Creating service principal for $env..."
az ad sp create --id $appId > /dev/null
echo "Assigning role for $env..."
az role assignment create --assignee $appId --role Owner --scope /subscriptions/$subscriptionId > /dev/null
for operation in plan apply; do
echo "Creating federated credential for $env $operation..."
az ad app federated-credential create --id $appId --parameters "{
\"name\": \"terraformstackscredential-$env-$operation\",
\"issuer\": \"https://app.terraform.io\",
\"subject\": \"organization:Natilik-Showcase:project:Terraform Stacks Demo:stack:terraform-stacks:deployment:$env:operation:$operation\",
\"audiences\": [\"api://AzureADTokenExchange\"]
}" > /dev/null
done
clientIds[$env]=$appId
done
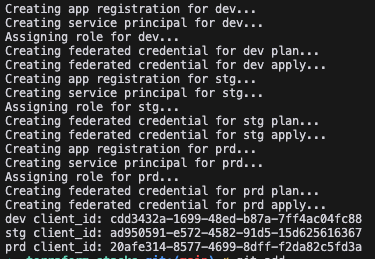
for env in dev stg prd; do
echo "$env client_id: ${clientIds[$env]}"
done
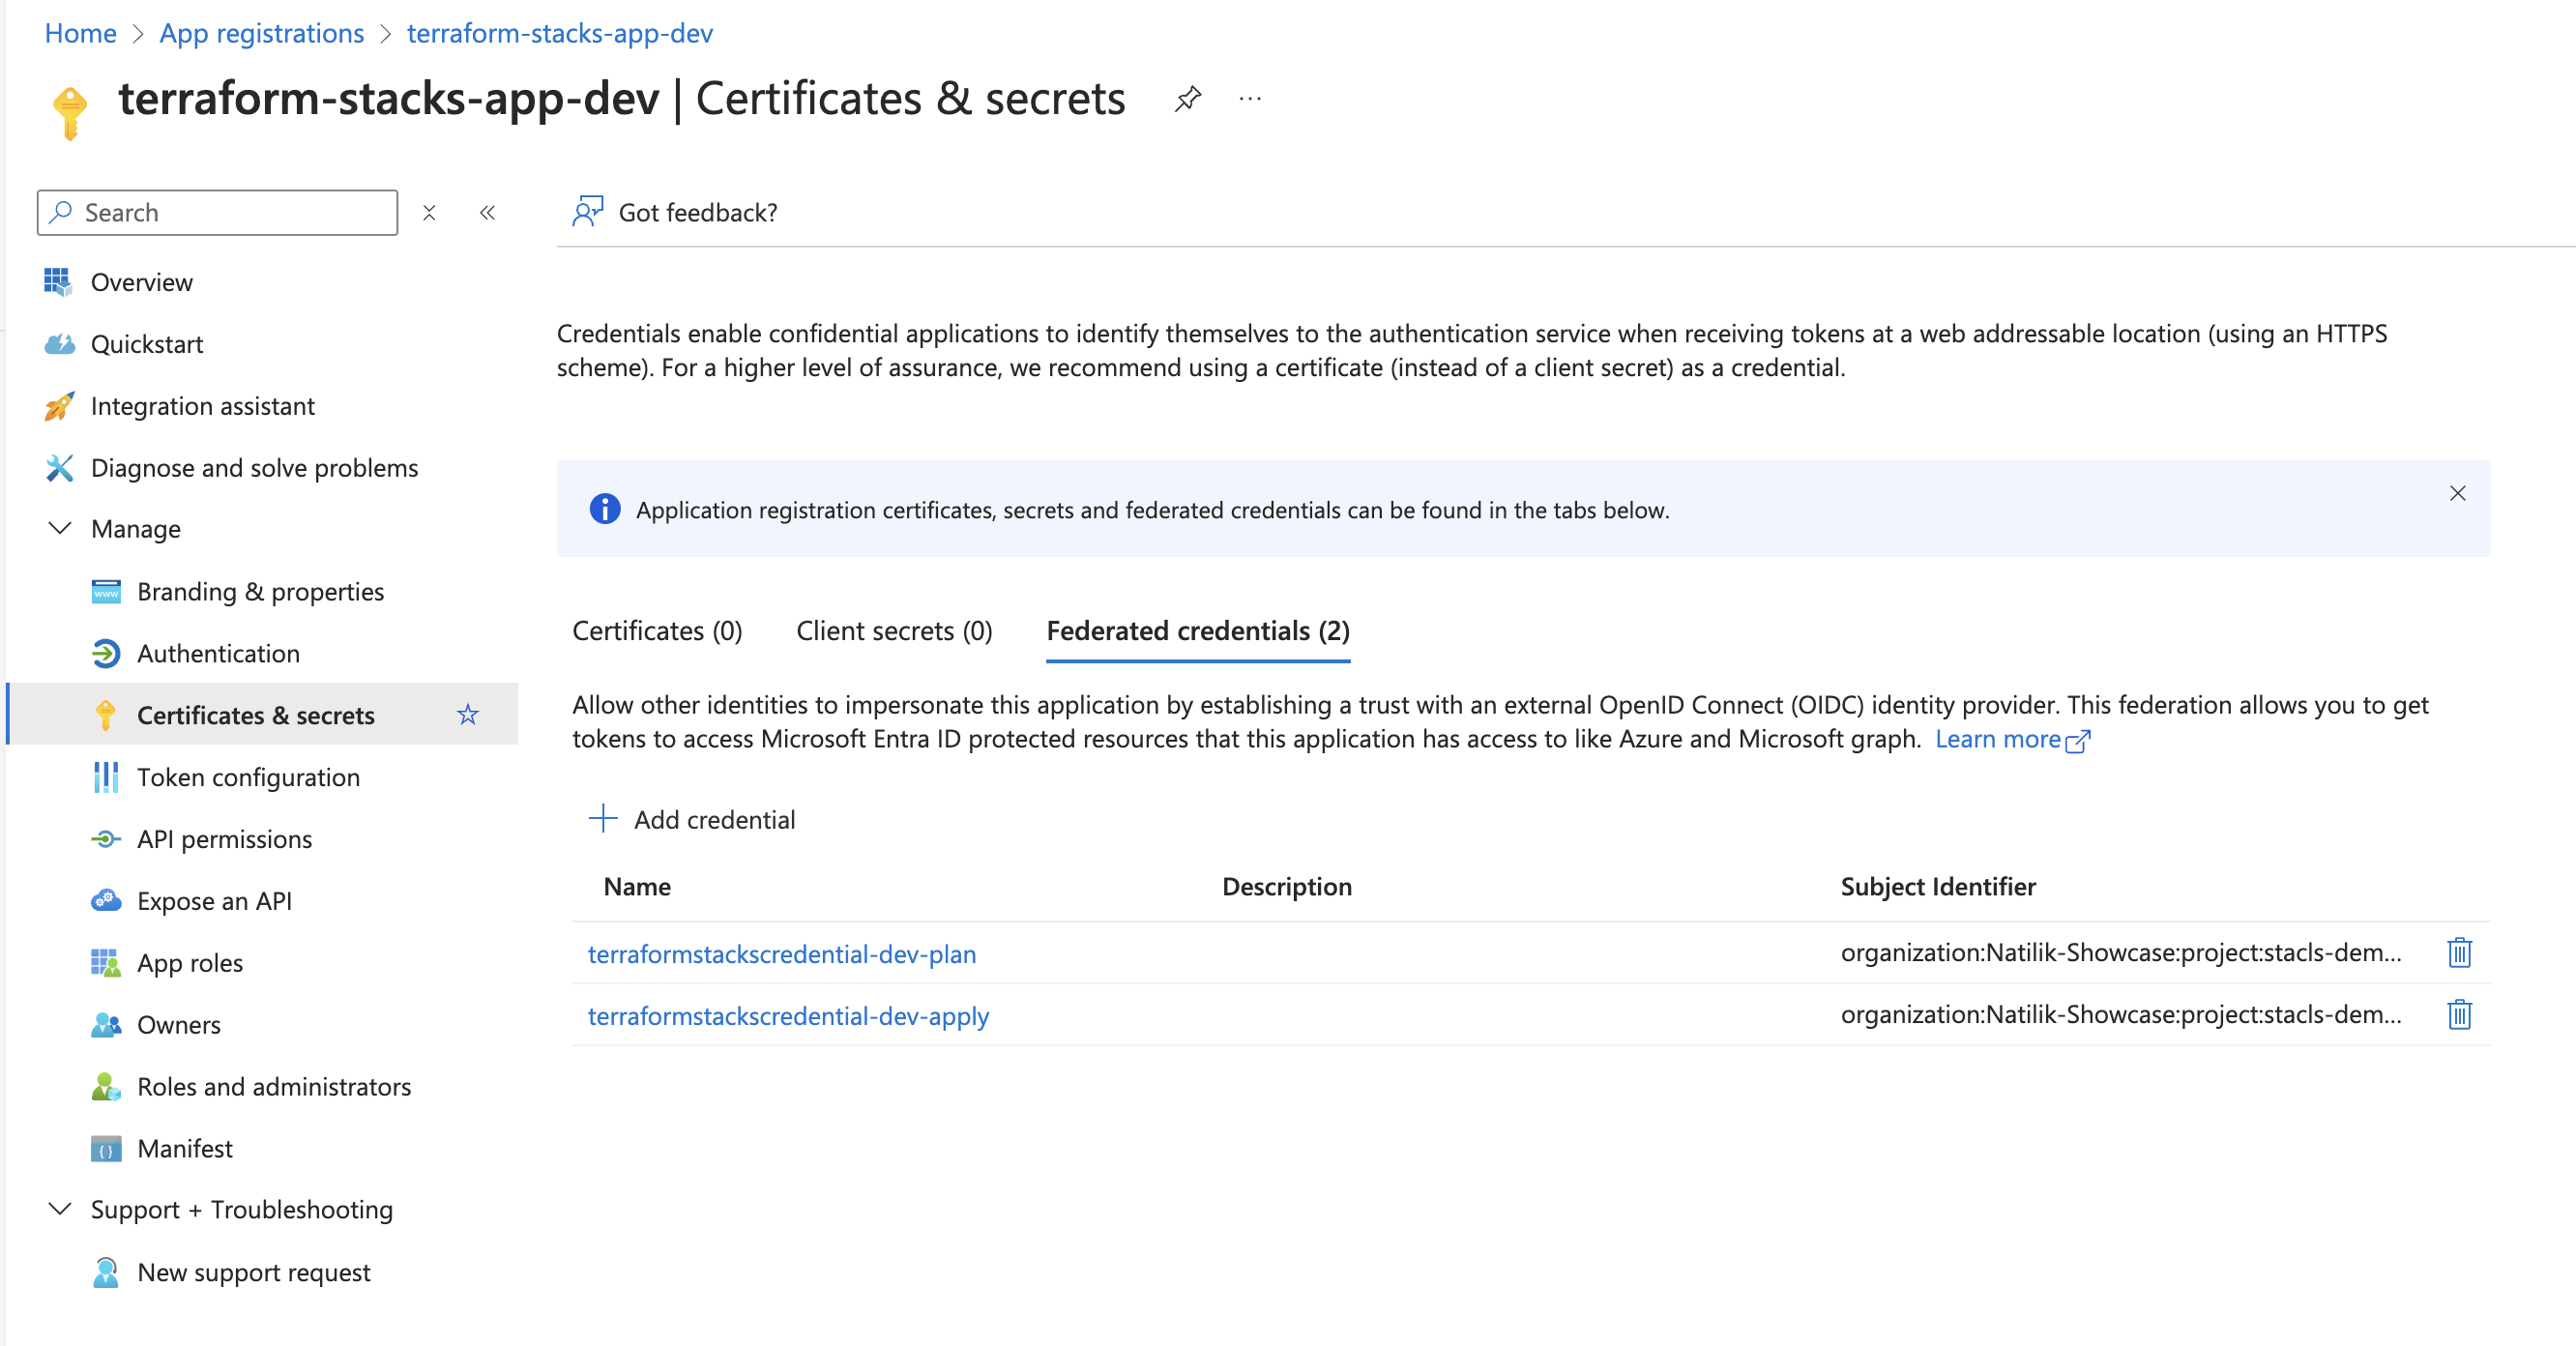
One important thing to note if you’re following along, is the subject string in the federated credential. This is a key part that allows Terraform Cloud to retrieve an access token, based on the deployment that is executing. It must match up with the values you later use in Terraform Cloud.
For each environment, two federated credentials are created - one for plan operations, and one for apply operations.
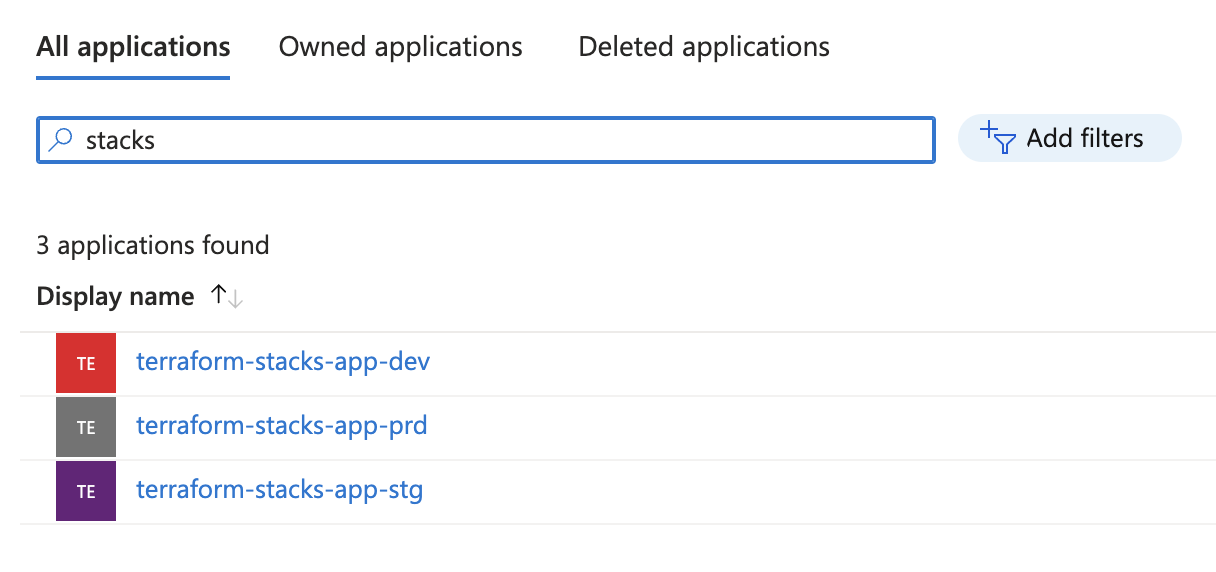
After running this script, I’ve three separate app registrations with Contributor access on three separate subscriptions. We are good to go!
Components
The first thing we want to define are the different components that are going to make up our stack. Each component refers to a Terraform module. In our example, this will be the VNet and VM module we saw referenced in the previous section.
Components are defined in .tfstack.hcl files. Here we can define many of the things we would usually define in a root configuration module, such as required_providers, variables, outputs, locals etc. Three main differences I spotted are:
- Instead of using resource or module blocks, we will make use of component blocks.
- Our provider blocks support a user assigned label.
- There is no top-level terraform block, you’ll just have required_providers at the root-level.
Let’s create two files - components.tfstack.hcl will be a bit like our old main.tf, and variables.tfstack.hcl which is equivalent to variables.tf.
# components.tfstack.hcl

required_providers {
  azurerm = {
    source  = "hashicorp/azurerm"
    version = "4.6.0"
  }
}

provider "azurerm" "this" {
  config {
    features {}
    tenant_id       = "f8667506-a537-4c81-842a-41fd0e547e43"
    subscription_id = var.subscription_id
    use_cli         = false
    use_oidc        = true
    oidc_token      = var.identity_token
    client_id       = var.client_id
  }
}

component "network" {
  source  = "app.terraform.io/Natilik-Showcase/vnet/azurerm"
  version = "2.0.2"
  inputs = {
    location      = var.location
    environment   = var.environment
    vnet_name     = var.vnet_name
    vnet_prefix   = var.vnet_prefix
    subnet_name   = var.subnet_name
    subnet_prefix = var.subnet_prefix
  }
  providers = {
    azurerm = provider.azurerm.this
  }
}

component "vm" {
  source  = "app.terraform.io/Natilik-Showcase/vm/azurerm"
  version = "2.0.1"
  inputs = {
    location      = var.location
    environment   = var.environment
    subnet_id     = component.network.subnet_id
    vm_name       = var.vm_name
    vm_username   = var.vm_username
    vm_password   = var.vm_password
  }
  providers = {
    azurerm = provider.azurerm.this
  }
}
# variables.tfstack.hcl

variable "location" {
  description = "The Azure region where resources will be created."
  type        = string
}

variable "vnet_name" {
  description = "The name of the Virtual Network (VNet)."
  type        = string
}

variable "vnet_prefix" {
  description = "The CIDR block for the Virtual Network (VNet)."
  type        = string
}

variable "subnet_name" {
  description = "The name of the subnet within the Virtual Network."
  type        = string
}

variable "subnet_prefix" {
  description = "The CIDR block for the subnet."
  type        = string
}

variable "vm_name" {
  description = "The name of the Virtual Machine."
  type        = string
}

variable "vm_username" {
  description = "The administrator username for the Virtual Machine."
  type        = string
}

variable "vm_password" {
  description = "The administrator password for the Virtual Machine."
  type        = string
}

variable "environment" {
  description = "The environment that the stack is being deployed to."
  type        = string
}

variable "subscription_id" {
  description = "The Azure subscription ID."
  type        = string
}

variable "identity_token" {
  description = "The OIDC token for the identity."
  ephemeral   = true
  type        = string
}

variable "client_id" {
  description = "The client ID for the identity."
  type        = string
}
Ignoring the fact that it is a terrible idea to have vm_password as a non-sensitive variable, what else is going on?
- Our components.tfstack.hcl file is defining what our stack will look like - a bit like a template.
- The inputs block passes values to the module being referenced. We can either hard code them if consistent across all environments or set them to use variables as I have done. The values for these
var.whateverreferences will be provided later when we define our deployments. - Our variables.tfstack.hcl file is essentially identical to the usual variables.tf file we’re used to.
- The eagle eyed of you may have spotted one new attribute -
ephemeral. This new variable attribute allows us to mark a variable as ephemeral and prevent it being written to state. Something that will be a great addition to Terraform regardless of Stacks and wasn’t something I’d come across until now! This is attribute is required for theidentity_tokenvariable, else it won’t work - you’ll get an error as I later found out.
Deployments
Next up, we need to define the different deployments that we want. Deployments are concrete instances of our stack. For those familiar with object-oriented programming, the components taken together are a bit like a class, and the deployments are instances of that class.
We define our deployments by using one or more files that end with .tfdeploy.hcl. Here we are just going to create one file called deployments.tfdeploy.hcl.
The deployment file schema consists of mainly new blocks - deployment, orchestrate and identity. They also support locals, though I’ve not used any in my example.
Notice in my example, I’ve plumbed in the client_id values I got from my earlier script along with the subscription IDs. No hardcoded Azure credentials however - Terraform Cloud will dynamically retrieve these based on the federated credential trust we setup earlier.
# deployments.tfdeploy.hcl

identity_token "azurerm" {
  audience = ["api://AzureADTokenExchange"]
}

deployment "dev" {
  inputs = {
    identity_token  = identity_token.azurerm.jwt
    client_id       = "cdd3432a-1699-48ed-b87a-7ff4ac04fc88"
    subscription_id = "ca8cc1e9-df12-4028-8697-50854c5a0923"
    location        = "uksouth"
    environment     = "dev"
    vnet_name       = "vnet-stacks-dev"
    vnet_prefix     = "10.1.0.0/16"
    subnet_name     = "snet-stacks-dev"
    subnet_prefix   = "10.1.1.0/24"
    vm_name         = "vm-stacks"
    vm_username     = "stacks"
    vm_password     = "Password1234!"
  }
}

deployment "stg" {
  inputs = {
    identity_token  = identity_token.azurerm.jwt
    client_id       = "ad950591-e572-4582-91d5-15d625616367"
    subscription_id = "bc884483-24ef-40c5-b8d4-0c35a50ca8f8"
    location        = "uksouth"
    environment     = "stg"
    vnet_name       = "vnet-stacks-stg"
    vnet_prefix     = "10.2.0.0/16"
    subnet_name     = "snet-stacks-dev"
    subnet_prefix   = "10.2.1.0/24"
    vm_name         = "vm-stacks"
    vm_username     = "stacks"
    vm_password     = "Password1234!"
  }
}

deployment "prd" {
  inputs = {
    identity_token  = identity_token.azurerm.jwt
    client_id       = "20afe314-8577-4699-8dff-f2da82c5fd3a"
    subscription_id = "e98088f7-5cd3-4c77-8dc7-7468bacdd6a5"
    location        = "uksouth"
    environment     = "prd"
    vnet_name       = "vnet-stacks-prd"
    vnet_prefix     = "10.3.0.0/16"
    subnet_name     = "snet-stacks-prd"
    subnet_prefix   = "10.3.1.0/24"
    vm_name         = "vm-stacks"
    vm_username     = "stacks"
    vm_password     = "Password1234!"
  }
}

orchestrate "auto_approve" "dev_only" {
  check {
    condition = context.plan.deployment == deployment.dev
    reason    = "Plan is not targeting dev."
  }

  check {
    condition = context.plan.applyable
    reason    = "Changes are not applyable."
  }
}
Here you can see I’ve defined three deployments - dev, stg and prd. For each, I’ve provided the values for the variables that my component expect. Obviously, I would not recommend hard coding a password, nor using something as crap as Password1234!, but it’s my tenant so I’ll do what I want 😉!
You can currently have a maximum of 20 deployments per stack, and up to 500 stack resources total in an organisation - so be careful whilst it is still in preview.
Orchestration Rules
You’ll notice in my deployments.tfstack.hcl file that I’ve added an orchestrate block. What is this?
orchestrate "auto_approve" "dev_only" {
  check {
    condition = context.plan.deployment == deployment.dev
    reason    = "Plan is not targeting dev."
  }

  check {
    condition = context.plan.applyable
    reason    = "Changes are not applyable."
  }
}
Orchestrate blocks allow us to define rules, such as when to auto-approve changes. Each rule consists of one or more check blocks. A check block in turn includes a condition, and a reason to display when the condition is not met (somewhat counter-intuitively). When all checks are met, the action will be applied - in this case “auto_approve”.
With this, we could include logic such as:
- Automatically deploy to development if the plan is successful (which is what I’ve done in this example).
- Automatically deploy to an environment if we are only creating new resources - don’t auto-approve if there are any deletions.
- Automatically deploy to development regardless of the type of change (create, update, delete etc.), but only deploy to production if we are creating new resources.
The possibilities go on.
Based on what I’ve seen in the portal, there are a number of actions that are currently supported:
- auto_approve
- deferral_replan
- replan
- converged
I’ve not looked into any except auto_approve yet, so I’ll cover the rest in a later article.
There is a hidden empty_plan auto_approve rule associated with all jobs. As the name suggest, it will automatically “apply” if the plan is empty - because nothing will happen.
The context variable used in the checks is populated by Terraform Cloud, and provides you access to a number of values:
- context.operation - Either “plan” or “apply” depending on the operation being executed.
- context.success - A boolean to indicate whether or not the plan succeeded or failed.
- context.plan - An object with a number of sub-values about the current plan:
- context.plan.mode - Either “normal”, “refresh-only” or “destroy”.
- context.plan.applyable - Whether or not a plan can be applied.
- context.plan.changes - A summary of the changes by operation. e.g.
context.plan.changes.addmay be ‘3’. - context.plan.component_changes - A map of changes by stack component. e.g.
context.plan.component_changes.component.vnetmay be ‘3 to add, 1 to change’. - context.plan.replans - The number of replans in the plans sequence (starting at 0) - not really sure on this one yet!
- context.plan.deployment - A reference to the current deployment. E.g.
context.plan.deploymentmay bedeployment.dev. Note, this was NOT just a simple string comparison of== "dev"as I initially thought!
Creating a Stack
Before we create a stack, we need to ensure our code is stored in version control - this is the only way of integrating with Terraform Stacks currently.
First off, we are going to create a new project and then select that we want to use the stacks option instead of a regular workspace. Keep in mind my earlier point - the values you use here need to match up with your federated credential subject values.


You’ll be prompted to select one of your integrated VCS providers and then choose the repository you want to use for the stack.
If you’ve selected the appropriate option, Terraform Cloud will start planning straight away once you save. That is of course, unless you are like me in which case you’ll see errors.


Fortunately, the error was pretty clear. It was expecting a .terraform-version file to be present in the root of the repository. See - told you I like learning the hard way! I added the following to the file and tried again.
1.10.0-alpha20240926
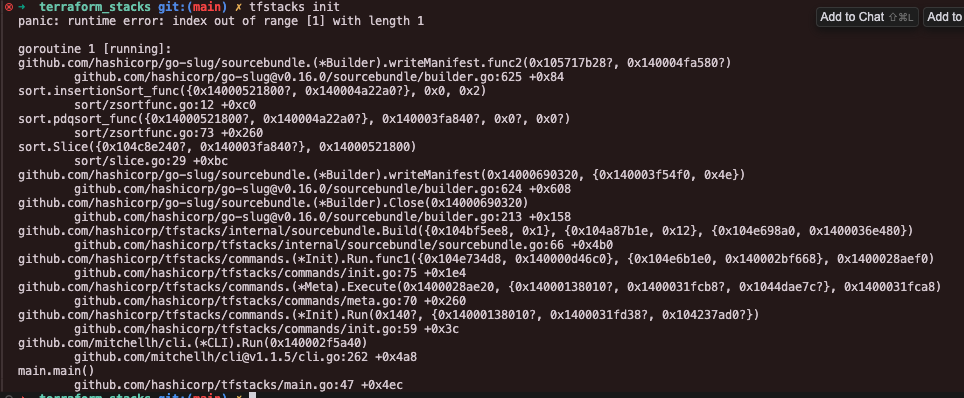
I then went through several iterations of errors, fixing my typos (as always 😉) before finally getting an error about a lack of lock file. At this point, I realised there was a new tfstacks CLI tool that I probably needed to use.
This new CLI has a tfstacks providers lock command that will generate a lock file for you based on your configuration. It also supports tfstacks init and tfstacks validate.
Whilst validate and provider lock worked for me, I couldn’t for the life of me get init to work. Such is life when playing with alpha tooling I guess!
I decided to ignore the error, commit the lock file to my VCS and push the code. Woohoo - a new error, my favourite kind of error.

Again, a pretty clear error. After adding the ephemeral attribute to the identity_token variable, I was able to run everything successfully!
Notice that dev has a different icon (green tick) - as per my orchestrate rule, it was automatically deployed.

Clicking through one of the plans in the quick view mode, we can see the different inputs I used, and the traditional terraform plan we’d expect for each component in the stack.

I approved the staging and production plans, and after a minute or two, we had three successfully deployed environments!

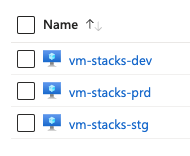
Jumping over to the Azure portal, we can see the three new VMs that were deployed!
Conclusion
I’ve only scratched the surface of what Terraform Stacks can do, and I intend to follow up with a look at some of the more complex usage, but hopefully this article has given you a good introduction into the new feature.
Are you testing Stacks? If so, what do you think? I’d be keen to hear your thoughts - so get in touch.